How I use React and TailwindCSS for UI in Unity

Building a user interface in unity can take a painstakingly long amount of time. Even creating simple things like a login menu can eat up hours of your time. When you’re focused on creating a game, the gameplay rightfully steals the spotlight. However, neglecting the UI can create hurdles when you’re trying to expand your game. Making individual scripts for every UI element becomes a headache.
I’ve commonly found myself wishing I can make UIs in the same way I can build websites. HTML and CSS allows for extremely quick prototyping and modification, while in Unity, even having a modal with rounded edges has you needing to use photoshop and having to set sprite slicing configurations in unity. This gets very annoying, very quick.
The Fix
Eventually when trying to streamline UI creation, I stumbled across OneJS. OneJS is an asset which manages to smoothly blend React code with Unity code. it does this by employing Jint, a C# JavaScript engine in order to interpret transpiled TypeScript code and uses Unity’s UI Toolkit as an underlying DOM structure, which let’s OneJS not need to run an external browser applet which most other solutions like Coherent do. Through Jint, OneJS has complete C#/JS interoperability giving React access to C# types, assemblies, and gameObjects set before and after runtime as you’ll see later.
I have no affiliation with OneJS whatsoever
Limitations
The only downsides I find are that since this isn’t running a browser applet and instead using Unity’s native UI Toolkit, styling options are more limited as for example some CSS transitions can’t be found, or when you want to have a scrollable window you can’t just set an element’s overflow property to scroll, but instead need to use a “Scrollview” element.
Adding OneJS to your project
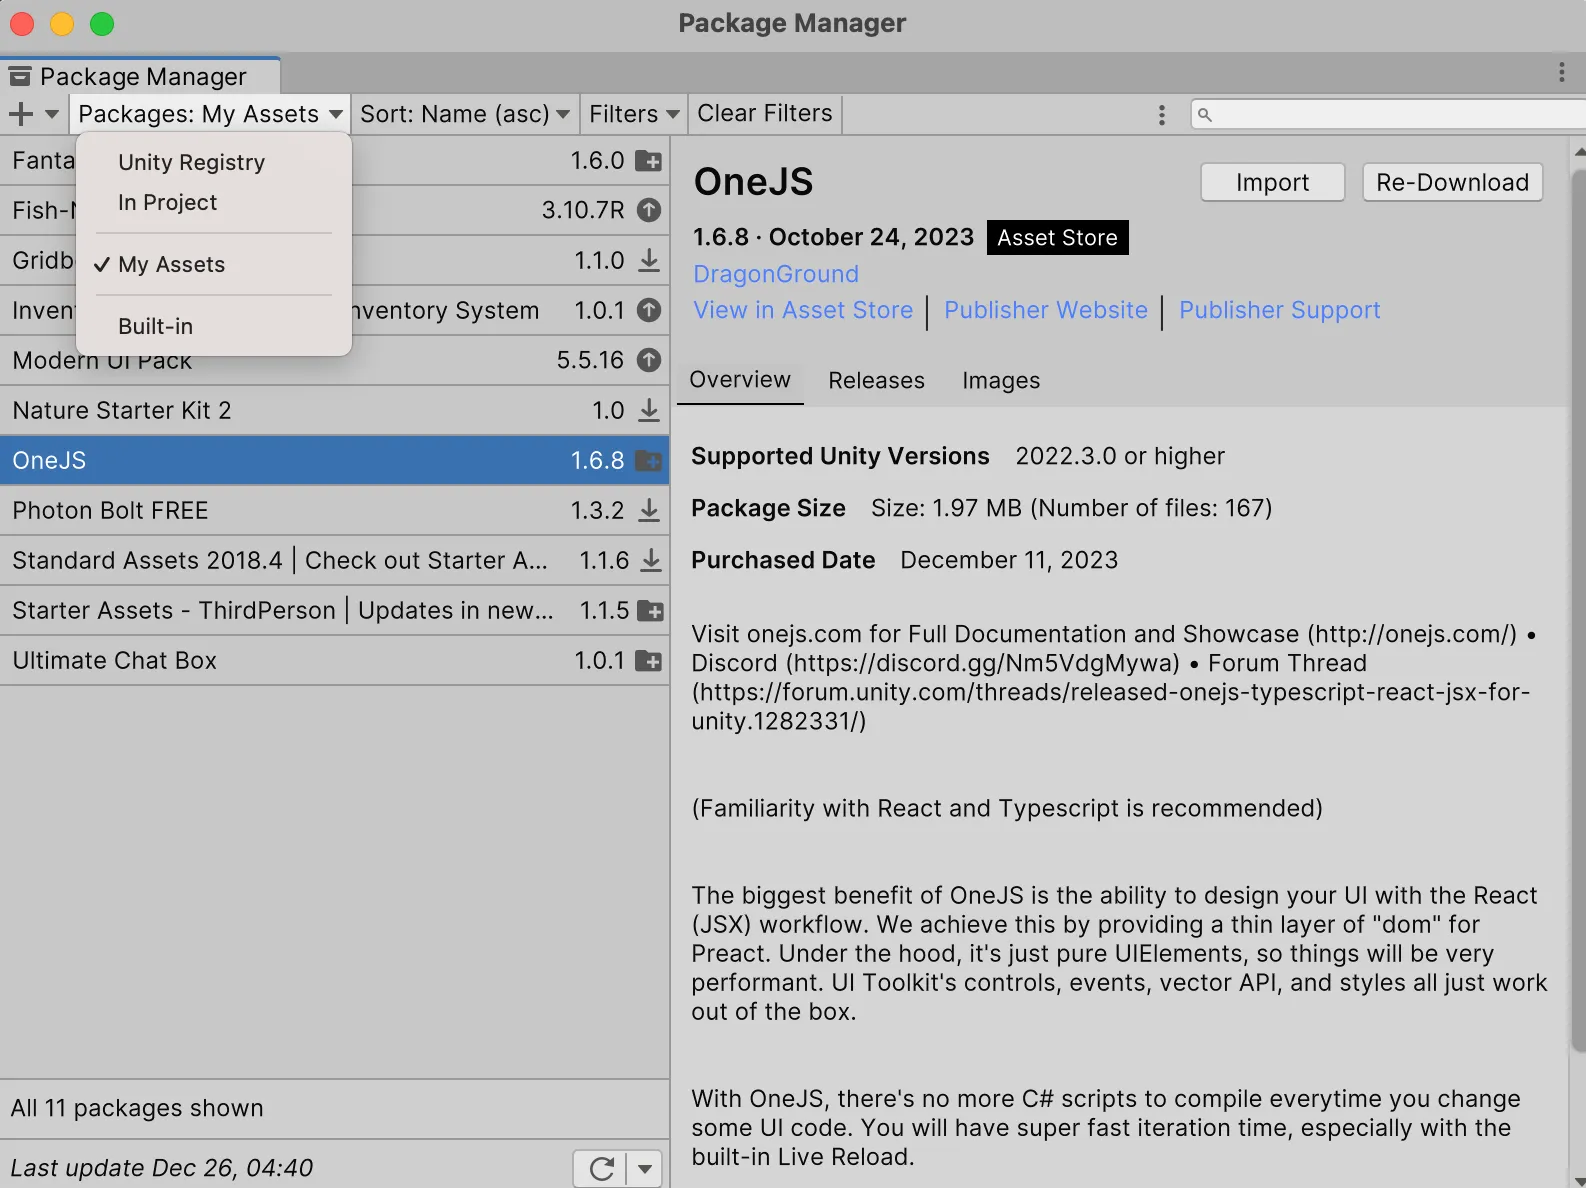
First thing you need to do to implement OneJS into your Unity project is purchase it for $70USD off the Unity Asset Store. Once you’ve done that import it into your projects from within Unity under Window > Package Manager > My Assets, find OneJS and press import.
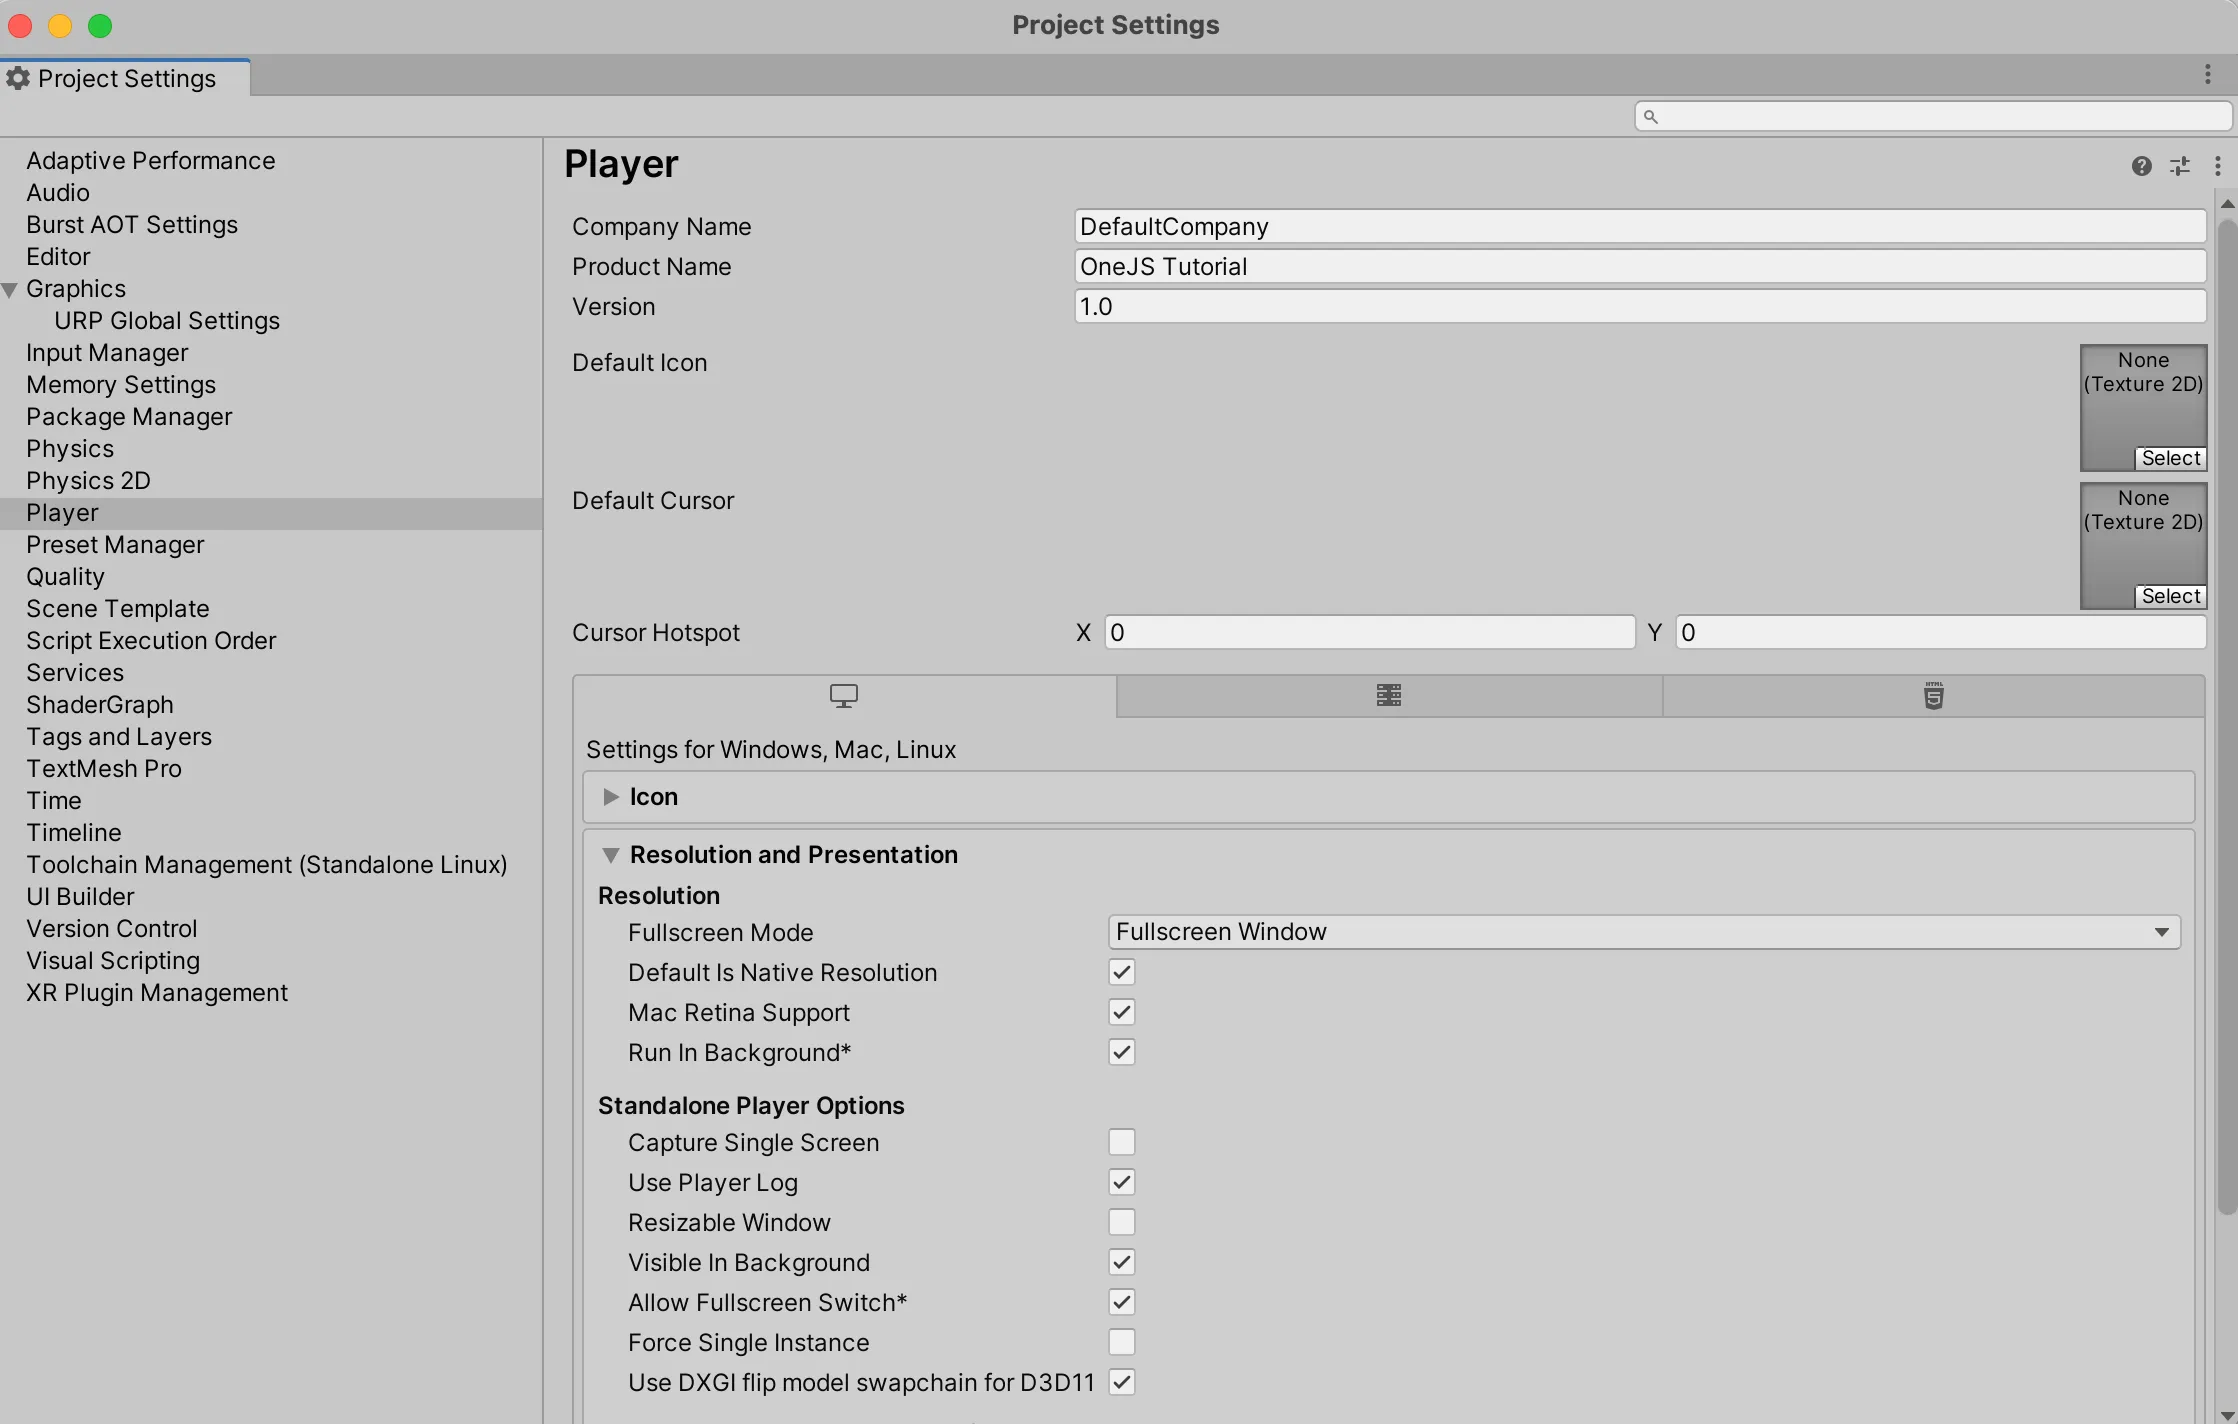
Before we continue in order for Hot-Reload to work, it requires that Run In Background is enabled in File > Build Settings > Player Settings (under Resolution and Presentation). Depending on your Unity version or platform, this may or may not be enabled by default. So it never hurts to double check.
Now we need OneJS to set up a few things before it’s usable. Do the following:
- First find the
ScriptEngineprefab and add it to your scene. - Enter play mode.
The first time ScriptEngine runs, it automatically set’s up some stuff under {ProjectDir}/OneJS these are:
- A default
tsconfig.json - A default
.vscode/settings.json - A default
index.jsscript (that just logs something to the console) ScriptLibfolder containing all the Javascript library files (and TS definitions) that are used by OneJS.Samplesfolder containing some sample code you can look at.
These folders and files will be auto-generated if deleted. Sometimes it maybe helpful to manually delete them when upgrading major OneJS versions.
VSCode
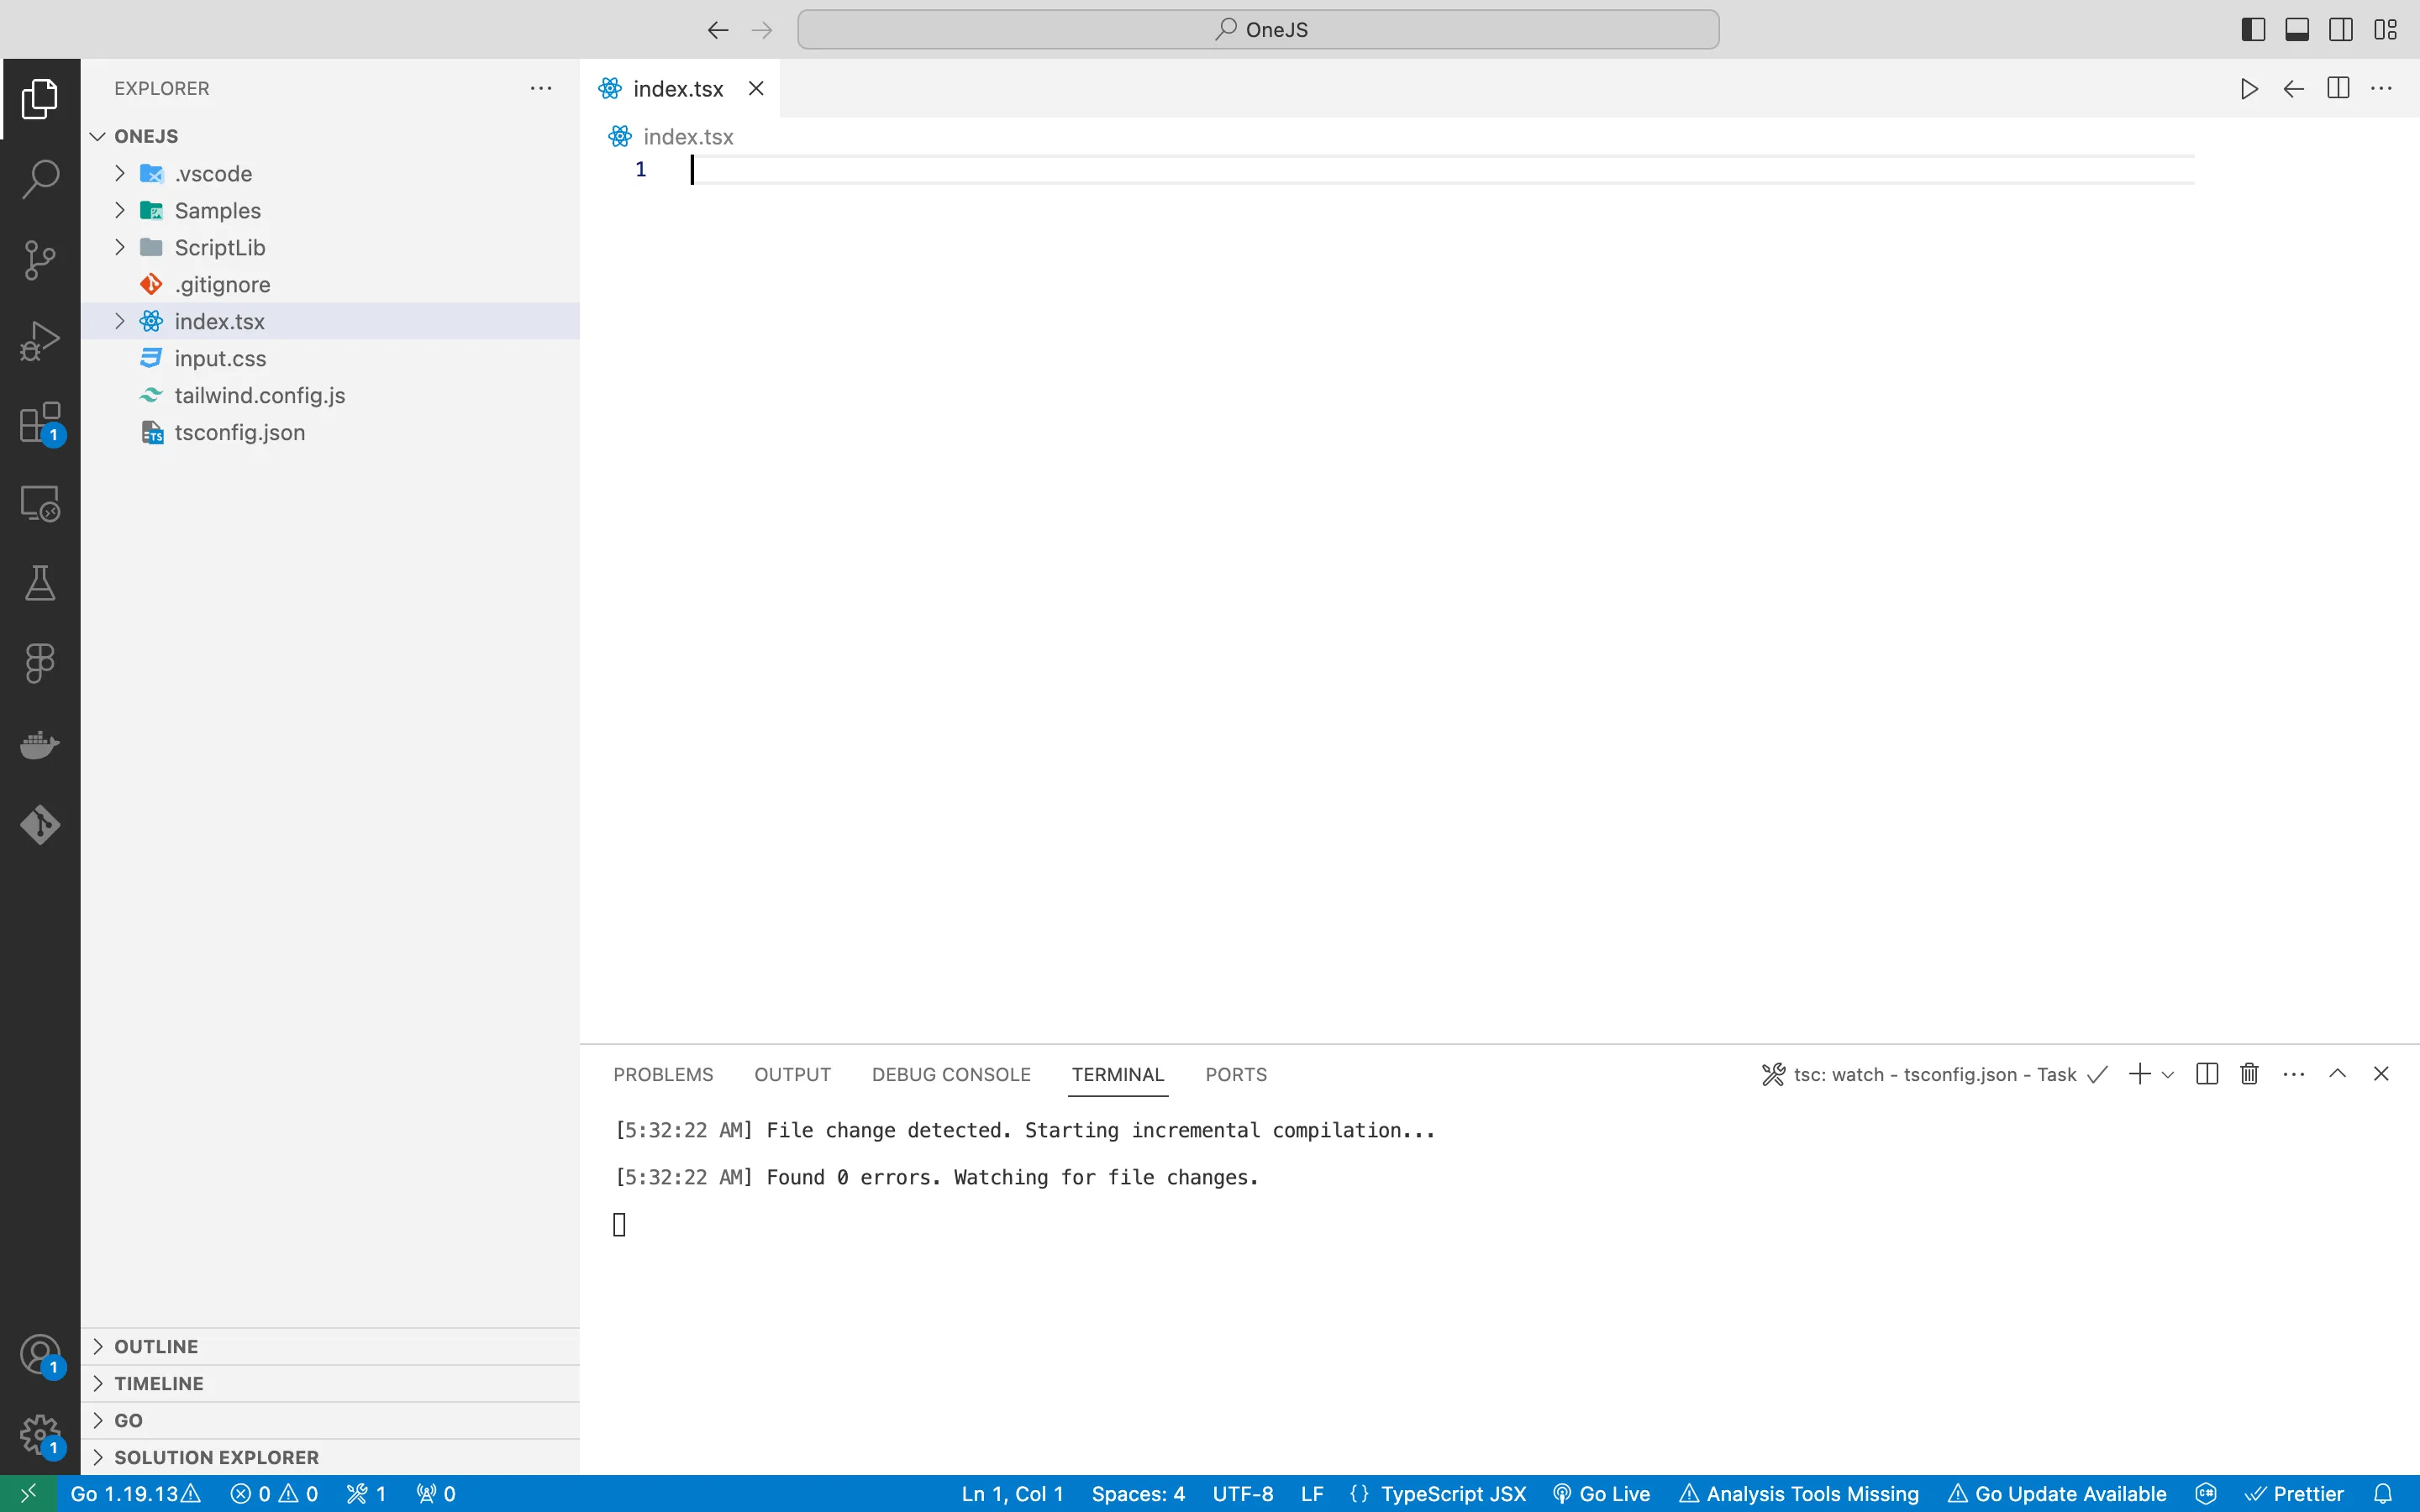
{ProjectDir}/OneJS is the folder to open when using VSCode. Typescript (.ts and .tsx) is the recommended language to use with OneJS. To have VSCode continuously transpile TS to JS in watch mode, use Ctrl + Shift + B or Cmd + Shift + B and choose tsc: watch - tsconfig.json.
Do make sure that you have Typescript installed on your system (i.e. via npm install -g typescript)
Create a new file index.tsx
If you’d like to also use TailwindCSS then do the following:
- Install
tailwindcssunder directory{projectDir}/OneJS
1
npm install -D tailwindcss
- Use
Ctrl + Shift + BorCmd + Shift + Band choosetailwindcss: watchor run
1
npx tailwindcss -i ./input.css -o ./output.css --watch
How to use OneJS
Now that OneJS is added to your project it’s time to actually make something with it. What we’ll make at first is a simple counter, press the button to increase the count.
To begin enter play mode so that you can see your UI. Next add the following code:
1
2
3
4
5
6
7
import { h, render } from "preact"

const Counter = () => {
    return <div>Hello world</div>
}

render(<Counter />, document.body)
This creates a component called counter, and renders it onto the screen. In play mode you should be able to see Hello World on the top left. At this point we’ll make a simple front end for the counter, replace the component with the following:
1
2
3
4
5
6
7
8
9
10
11
12
13
14
15
16
const Counter = () => {
  const [count, setCount] = useState(0);

  const incrementCount = () => {
    setCount(count + 1);
  };

  return (
    <button
      class="self-center my-auto bg-red-600 h-20 w-20 flex justify-center items-center rounded-xl"
      onClick={incrementCount}
    >
      <div class="text-white bold text-3xl">{count}</div>
    </button>
  );
};
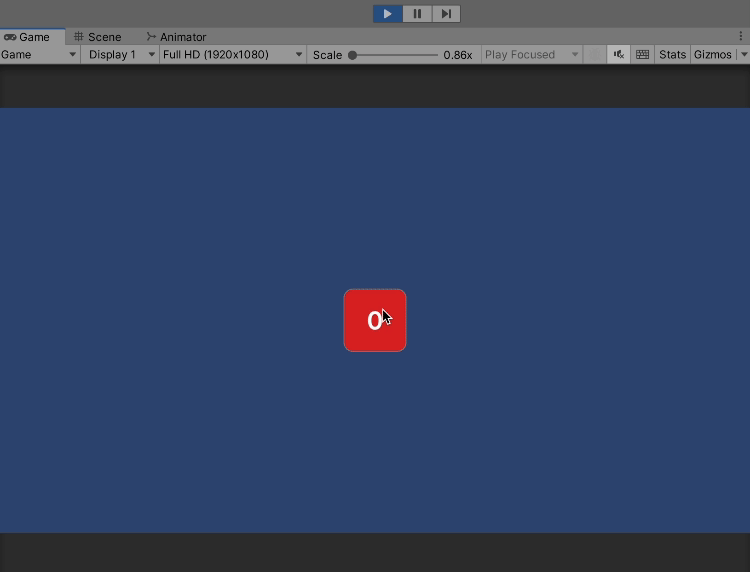
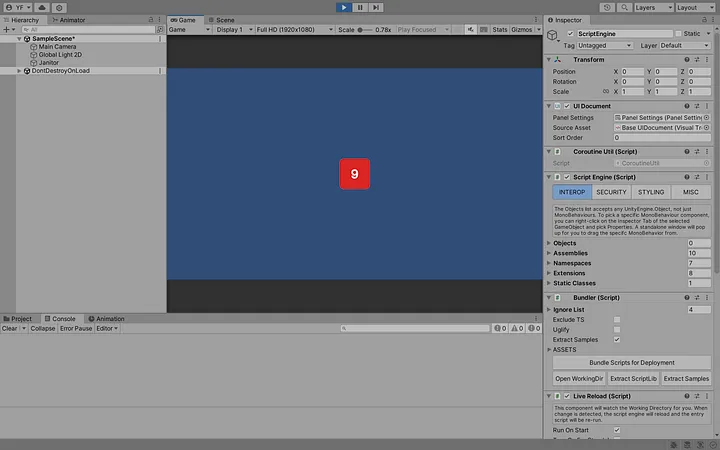 How the above code should look like in Play Mode
This creates a simple button which displays a count. When the button is pressed the counter increases by one. As you can see, in this example the state is entirely managed within React, when developing a game this is not very useful as you’ll likely want to push state from the game to UI. To do that we’ll make a CounterManager object which will hold all the state and expose methods to the UI to alter it.
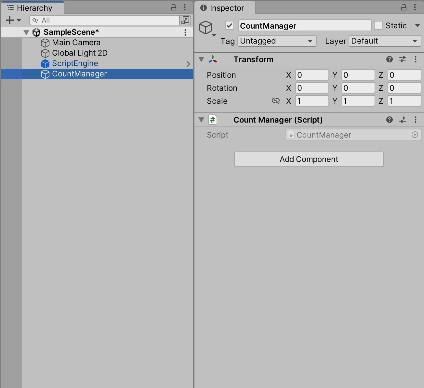
Start by right clicking on the scene Hierarchy and clicking
Create Empty. Call the new game object CountManager.In the inspector press Add Component to create a new script and call it
CountManageras well.Open the script and replace the content with the following:
1
2
3
4
5
6
7
8
9
10
11
12
13
14
15
16
17
18
19
using System;
using System.Collections;
using System.Collections.Generic;
using UnityEngine;

public class CountManager : MonoBehaviour
{
    public int Count => _count;

    public event Action<int> OnCountChanged;

    int _count = 0;

    public void IncreaseCount(int increaseAmount)
    {
        _count += increaseAmount;
        OnCountChanged?.Invoke(Count);
    }
}
This just creates a property _count, (accessed through the getter property Count , you don’t necessarily need it) and a method IncreaseCount which takes an increaseAmount as a parameter which increases _count by that amount. IncreaseCount also pushes an event which is necessary for OneJS know to fetch the new value and re-render the affected components.
Now we need to make it so that typescript can access our CountManager object.
While having the
CountManagerGameObject selected, right-click on the Inspector tab, and pick “Properties”. (This opens up a standalone popup window for theCountManagerGameObject)Now, select the ScriptEngine GameObject and locate the
Objectslist under INTEROP.Drag the
CountManagercomponent from the popup window onto theObjectslist.Name the mapping to “cman”
Now your CountManager MonoBehaviour object will be accessible from Typescript via require("cman").
You can also make objects accessible at runtime by either passing them as a “prop” (as we’re doing with Count) or if you want to be able to access them using require() you can call ScriptEngine.ModuleEngine.RegisterInternalModule(name, obj) in C#. These are just a few ways of many you can do interop between C# and Typescript. Refer to the Jint readme for more info.
Now that we’ve made CountManager accessible from TypeScript let’s update our component to make use of it:
1
2
3
4
5
6
7
8
9
10
11
12
13
14
15
16
17
18
19
20
21
22
23
import { useEventfulState } from 'onejs';
import { h, render } from 'preact';
import { useState } from 'preact/hooks';

const Counter = () => {
  const cman = require("cman");
  const count = useEventfulState(cman, "Count");

  const incrementCount = () => {
    cman.IncreaseCount(1);
  };

  return (
    <button
      class="self-center my-auto bg-red-600 h-20 w-20 flex justify-center items-center rounded-xl"
      onClick={incrementCount}
    >
      <div class="text-white bold text-3xl">{count}</div>
    </button>
  );
};

render(<Counter />, document.body);
As you can see we access our CountManager object through require(“cman”) . We also make use of a hook useEventfulState() this hook removes some boilerplate and makes it so that anytime OnCountChanged is called, we fetch the new count variable and re-render the component. You can see the implementation for it here.
useEventfulState(obj, "Count")assumes the C#objhas a property named “Count” and an event named “OnCountChanged”. OurCountManagersatisfies both conditions.
Now if you’ve followed the steps shown you should have a working counter which pushes state from our CountManager object and should look like this:
This was meant to show you what’s possible with OneJS and give you a starting point to integrating React with Unity. I have no affiliation with OneJS whatsoever and wrote this to inform the community. Thanks for reading!